Paneer, a versatile and beloved cheese in Indian cuisine, adds richness and flavor to a variety of dishes. While it’s readily available in stores, there’s something special about crafting your own paneer at home. In this blog, we’ll take you through the simple and rewarding process of making paneer from scratch, allowing you to savor the satisfaction of creating this culinary delight with your own hands.
Ingredients: To make paneer, you’ll need:
- Milk: Whole milk is preferred for its higher fat content, which yields a creamier paneer.
- Acid: Lemon juice, vinegar, or yogurt can be used to curdle the milk and separate the curds from the whey.
- Cheesecloth or muslin cloth: To strain the curds and separate them from the whey.
Step-by-Step Process:
- Heat the Milk: Pour the milk into a large, heavy-bottomed pot and bring it to a gentle boil over medium heat, stirring occasionally to prevent it from scorching.
- Add the Acid: Once the milk reaches a gentle boil, reduce the heat and gradually add the acid of your choice (lemon juice, vinegar, or yogurt), stirring continuously. As you add the acid, you’ll notice the milk starting to curdle, with the white curds separating from the translucent whey.
- Strain the Curds: Line a colander with cheesecloth or muslin cloth and place it over a large bowl or in the sink. Carefully pour the curdled milk mixture into the colander, allowing the whey to drain away and leaving behind the curds.
- Rinse the Curds: Rinse the curds under cold water to remove any traces of acid and whey, as well as to cool them down.
- Press and Shape: Gather the corners of the cheesecloth and twist them together to form a bundle. Press down gently to squeeze out excess moisture, then shape the paneer into a square or rectangle. Place the bundle on a plate or cutting board, and weigh it down with a heavy object (such as a cast-iron skillet or a stack of plates) to help expel remaining moisture and shape the paneer.
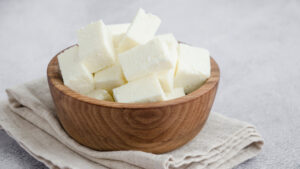
- Refrigerate and Set: Let the paneer rest in the refrigerator for at least 1-2 hours, or until it firms up and holds its shape.
Tips and Variations:
- For a softer, creamier paneer, use less acid and avoid pressing it too firmly.
- Experiment with different acids to find the flavor profile you prefer.
- Add herbs, spices, or even dried fruits and nuts to the milk before curdling for flavored paneer variations.
- Save the whey for use in soups, stews, or as a nutritious addition to smoothies.
Conclusion: Making paneer at home is a simple yet deeply rewarding process that allows you to appreciate the artistry and tradition of cheese making. With just a few basic ingredients and some patience, you can create fresh, flavorful paneer that elevates your favorite dishes to new heights. So roll up your sleeves, gather your ingredients, and embark on a culinary journey that celebrates the joy of crafting delicious food from scratch.