There’s something inherently refreshing and uplifting about the bright, tangy flavor of oranges. Transforming these vibrant citrus fruits into a velvety jam is a delightful culinary endeavor that fills the kitchen with warmth and aroma. In this blog, I’ll guide you through a simple yet rewarding recipe for crafting your own batch of sunshine-filled orange jam.
- 6 large oranges
- 2 lemons
- 1 kg granulated sugar
- 1 teaspoon of vanilla extract (optional, for added depth of flavor)
Instructions:
Prepare the Oranges and Lemons: Begin by thoroughly washing the oranges and lemons under cold running water. Using a vegetable peeler or a sharp knife, carefully remove the zest from three of the oranges and both lemons. Take care to avoid including the bitter white pith. Finely chop the zest and set it aside.
- Extract the Juice: Juice all the oranges and lemons, ensuring to strain the juice to remove any seeds or pulp. You should have approximately 1 liter of combined orange and lemon juice.
- Combine Juice and Zest: In a large, heavy-bottomed saucepan, combine the strained juice and the chopped zest. If you’re opting for the vanilla extract, this is the perfect time to add it to the mixture, enhancing the flavor profile of the jam.
- Add Sugar and Heat: Stir in the granulated sugar until it completely dissolves into the citrus mixture. Place the saucepan over medium heat and bring the mixture to a gentle boil, stirring occasionally to prevent sticking.
- Simmer Until Thickened: Once the mixture reaches a boil, reduce the heat to low and let it simmer uncovered. Stir occasionally to prevent scorching. As the jam cooks, it will gradually thicken and take on a glossy appearance. This process typically takes around 45 minutes to 1 hour.
- Test for Doneness: To check if the jam has reached the desired consistency, perform a “wrinkle test.” Place a small amount of jam on a chilled plate and let it cool for a few seconds. Push the jam with your finger; if it wrinkles and holds its shape, it’s ready. If not, continue cooking and retest every few minutes.
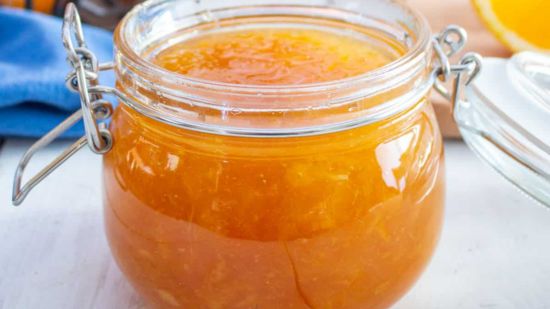
- Jar and Store: Once the jam achieves the perfect thickness, remove it from the heat and allow it to cool slightly. Carefully transfer the hot jam into clean, sterilized jars, leaving a small gap (about 1/4 inch) at the top. Seal the jars tightly with lids.
- Optional: Water Bath Canning For long-term storage, consider water bath canning to ensure proper sealing of the jars. Submerge the filled and lidded jars in boiling water for approximately 10 minutes. Then, carefully remove them and allow them to cool completely before storing in a cool, dark place.
- Enjoy Your Homemade Orange Jam: Once cooled and sealed, your homemade orange jam is ready to grace your breakfast table! Spread it generously on toast, croissants, or English muffins for a burst of citrusy goodness. It also serves as a delightful filling for cakes, pastries, and thumbprint cookies. Store any unopened jars in the pantry, and refrigerate opened jars for optimal freshness.
Conclusion: With just a handful of fresh ingredients and a touch of culinary magic, you can create a jar of homemade orange jam that encapsulates the essence of sunny days and citrus groves. Whether enjoyed as a breakfast indulgence or incorporated into your favorite recipes, this bright and flavorful jam is sure to elevate every culinary creation. Embrace the joy of homemade goodness with this simple yet irresistible orange jam recipe.